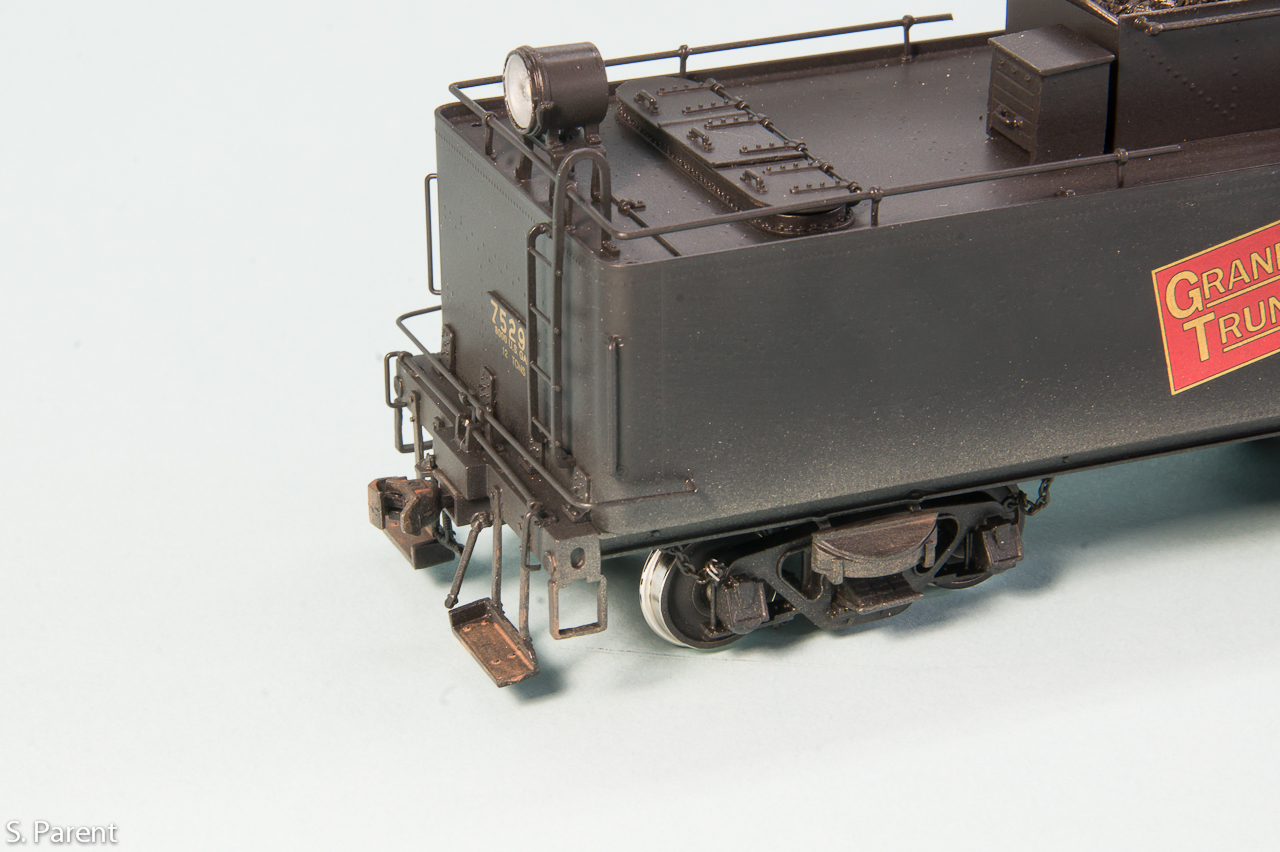
I have completed my customization of the RR model. Here is the final result and a quick explanation of the modifications I did.

One of the difference from the RR model and specifically to road number 7529. Engine 7529 had no safety panels behind the foot board. I wasn't planning on taking them out because I thought they were cast in. After a close examination, I noticed they were add-on and decided to unsolder them. Since I was going to repaint the pilot, I then decided to add the missing poling pockets and improved the look of the coupler pocket using styrene tubing and pieces.

Another small detail that was missing is the electrical box on the front cab wall. I used one of my own castings and fix it with ACC.

Now back to my original plans:
Wipers for Electrical pick-up and the Cam on the Locomotive:
I
replaced the 3 small bearing cover plates on the left (insulated side) with a
long piece of 1/32” double sided PC board. On the side up (bearing
side), I solder a 0.018” thick piece to match the cover plate. On the
down side (towards the tracks), I have first drilled the holes for the mounting
screws and made insulation cuts in the copper to insulate the mounting
screws. Then I made the wipers from 0.005”phosphor bronze flat sheet and solder in
place. I have solder and run a small piece of wire to connect all
three wipers up to the decoder on top of the motor.
For
the cam wiper, I used the brake rigs details as holder. Again, using
the 1/32” double sided PC board, I solder on side on the brake rig, behind the
cam and solder a piece of phosphor bronze on the other side.

Decoder
installation:
At
first, I was going to install the Tsunami decoder (TSU-1000) in the tender.
After test fitting, I realized that I could fit it on top of the motor in
the boiler. Installing the decoder inside the locomotive is my favorite
option for many reasons, for one, less wires between the locomotive and the
tender, especially if you use the mechanical cam trigger and able to fit the
speaker inside the boiler, since I also build or modify all my locomotives for all
wheel pick up, it allows the engine to run by itself without the tender
attached. Not that I run my locomotives without a tender but it makes it
easier during programming or test run. Another advantage as well is to
have as much as possible the wiring on the frame/mechanism and have connectors
for the lights and speaker when taking off the boiler.

Boiler Modification:
 I
made 2 minor modifications on the boiler assembly. The first one was to
allow a close coupling of the tender and make an opening below the cab floor to
run the wire harness. To do this, I have unsolder the bumper
casting. This is not a detail than can be seen and additionally, it was
oversize, probably to fill the larger than scale opening between the tender and
locomotive. Then using a cut off tool and some filling, I made an opening
between the 2 screw holes, large enough so that a bundle of several wires can
go through.
I
made 2 minor modifications on the boiler assembly. The first one was to
allow a close coupling of the tender and make an opening below the cab floor to
run the wire harness. To do this, I have unsolder the bumper
casting. This is not a detail than can be seen and additionally, it was
oversize, probably to fill the larger than scale opening between the tender and
locomotive. Then using a cut off tool and some filling, I made an opening
between the 2 screw holes, large enough so that a bundle of several wires can
go through.
The
second one was to open up for about 3/8” longer the wide opening of the
boiler. This was require to be capable of fitting the boiler on top of
the frame with the Tsunami decoder wrapped on top of the motor. Again,
this is not a visible modification, the larger opening remains behind boiler
mounted details.

Speaker
installation:
The
speaker with enclosure is mounted loose inside the smoke box section of
the boiler, replacing the weight. Before doing this, I tested the pulling
power of the locomotive without the weight. It could still pull a 12-car string
of full length AM Pullman cars. That’s good enough for me….. The
speaker must be installed after the boiler is assembled over the chassis,
through the smoke box front.

Here is the smoke box front where I replaced the number board with the correct CN style.

Tender modification:
 Then
I have added the wipers on the insulated wheels. That was not an easy job
because the retaining chain details had to be detached and it was not easy to
put them back in place. I have installed the wiper by using my own
etch wiper holders and phosphor bronze wire. I used the existing mounting
screw mount of the truck assembly but replaced with a nylon screw for
insulation. I forgot to take a picture of that before putting back the
truck in place and will not take them out again because of the tedious chain
installation.
Then
I have added the wipers on the insulated wheels. That was not an easy job
because the retaining chain details had to be detached and it was not easy to
put them back in place. I have installed the wiper by using my own
etch wiper holders and phosphor bronze wire. I used the existing mounting
screw mount of the truck assembly but replaced with a nylon screw for
insulation. I forgot to take a picture of that before putting back the
truck in place and will not take them out again because of the tedious chain
installation.
I
have oversee one thing though, I did not revert the insulated side on the
tender. This means that the tender and boiler are not the same
polarity. This is not an issue so to speak but with a close coupling,
there is always a risk of having the locomotive and tender touching in sharp
curves and it might create a short. It is not a problem on my home
layout but it could on someone else or sharp sidings the workshop
modules. If I see that it become a problem, I will make the change but it
means disconnecting the chains again L
Below are additional photos of the finished model.