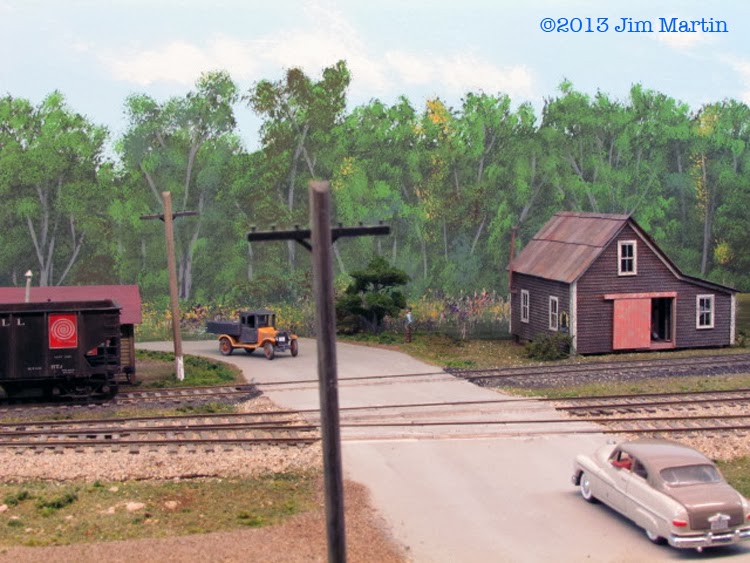
(Member Jim Martin updates us on his scenery work on his home layout...)
As I mentioned in my previous post, I’m redoing the ground cover on Port Dover, a decision spurred by Trevor’s excellent results on his Port Rowan layout. Trevor used static grass to excellent effect, but after a few experiments I’m still not confident in my ability to control the process, so I reverted to the same materials used on the back hillsides when I started building Port Dover seven years ago: wig hair.
Back then I used a chestnut colour synthetic braid marketed under the name African Gold. African Gold apparently has no website and Wal-Mart no longer carries this item. Having used up the last of it, I am now actively looking for another source.
I learned the wig hair technique from Workshop member Simon Parent, who in turn was taught by scenery guru, the late Bill Kerr. As you follow along in the pictures you’ll see that planting the “grass” by hand renders a nice random, wild-looking effect.
I didn’t like the original green aerosol colour but it was the best I could find at the time so I put up with it over the years. For this job I have used Liquidtex water-based aerosol paints. They are found in a wide variety of colours in art supply stores. I chose Chromium Yellow and Moss Green – blended together, they render a much more natural grass colour. These paints aren’t cheap, about 15 bucks a can, but I think they’re worth it. It helps if you can wait for one of Michaels store discount coupons. The cans are large and should last a long time. (Fingers crossed!)
This time around I am dressing up the grass texture with ground foam, flower patches and small bushes. Trees will be added as a final step when the module is placed in front of the backdrop and I can determine where best to place them. I am modelling early to mid-September. I’m striving for an overall green colour in my grass and foliage with the first subtle hints of fall colouration. Follow along, and click on any image for a larger version:

Retrofitting grass to existing ground foam scenery is a bit fiddly. It’s best to work in small patches. As shown above, prepare the area you're working on by removing trees, bushes and larger bits of foam and then mask the areas you want to protect from the spray glue.

In the above image, I’m using 3-M Super 77 spray glue, the low mist variety. With my other hand I’m holding a cardboard mask. Apply generously and work in a well-ventilated area.

The above image shows what the wig looks like when it’s cut into short lengths.

As shown above, roll manageable tufts of hair between your fingers so the strands line up, hold lightly and gently dab into the glue surface, leaving some of the strands behind as you lift up. Repeat, over and over and… Until....

Already not looking too bad. When the hair has been applied over the full area, use a vacuum cleaner hose to help stand the strands of “grass” up and remove any loose strands that didn’t stick. As shown above, the chestnut hair colour isn’t bad looking by itself if you’re going for a really late fall effect. The wig hair appears to have a lower sheen than the static grass products.

Above, the grass has been lightly oversprayed with the Liquidtex aerosol paints. The water-based paints do have a greater tendency to clog so it’s important to invert the can and clean the nozzle after each use.

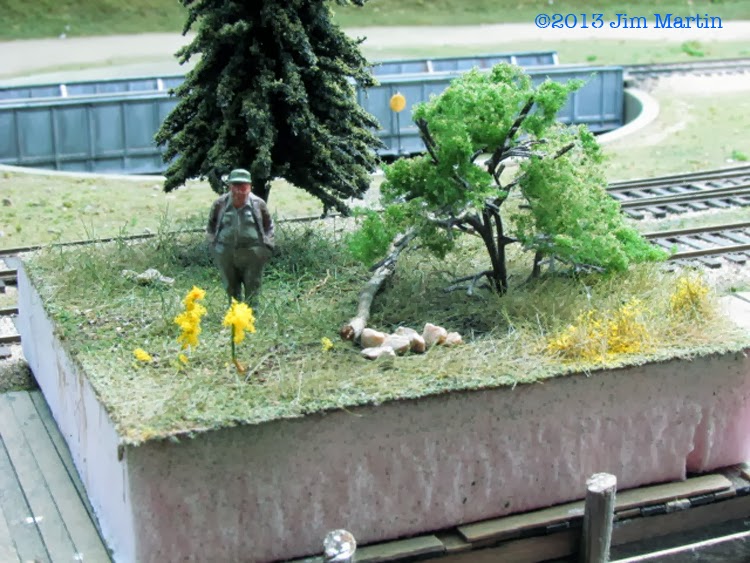
You can really dress up the appearance of foam foliage clusters by hitting them with a light over spray of the chromium yellow. The above picture really doesn’t do justice to the treated piece on the left, but the spray highlights really help under typical layout lighting.

TaDa! Here’s the finished effect so far. I’ve added a fine landscaping sand into the fibres and around the edges of the treated area to blend the masked edges back into the layout. Other textures and colours of ground foam have been added. The larger bits kind of float on the grass and look really effective as small bushes. I then spray the area with a fine mist of soapy water and follow up with diluted white glue. Pushing the nozzle of the eye dropper or paint pipette into the base of the grass as you apply the glue really helps to anchor everything.
That’s it so far. I’ll hold off on larger bushes and trees until I see how it all looks against the backdrop. Cheers for now!
-Jim
As I mentioned in my previous post, I’m redoing the ground cover on Port Dover, a decision spurred by Trevor’s excellent results on his Port Rowan layout. Trevor used static grass to excellent effect, but after a few experiments I’m still not confident in my ability to control the process, so I reverted to the same materials used on the back hillsides when I started building Port Dover seven years ago: wig hair.
Back then I used a chestnut colour synthetic braid marketed under the name African Gold. African Gold apparently has no website and Wal-Mart no longer carries this item. Having used up the last of it, I am now actively looking for another source.
I learned the wig hair technique from Workshop member Simon Parent, who in turn was taught by scenery guru, the late Bill Kerr. As you follow along in the pictures you’ll see that planting the “grass” by hand renders a nice random, wild-looking effect.
I didn’t like the original green aerosol colour but it was the best I could find at the time so I put up with it over the years. For this job I have used Liquidtex water-based aerosol paints. They are found in a wide variety of colours in art supply stores. I chose Chromium Yellow and Moss Green – blended together, they render a much more natural grass colour. These paints aren’t cheap, about 15 bucks a can, but I think they’re worth it. It helps if you can wait for one of Michaels store discount coupons. The cans are large and should last a long time. (Fingers crossed!)
This time around I am dressing up the grass texture with ground foam, flower patches and small bushes. Trees will be added as a final step when the module is placed in front of the backdrop and I can determine where best to place them. I am modelling early to mid-September. I’m striving for an overall green colour in my grass and foliage with the first subtle hints of fall colouration. Follow along, and click on any image for a larger version:

Retrofitting grass to existing ground foam scenery is a bit fiddly. It’s best to work in small patches. As shown above, prepare the area you're working on by removing trees, bushes and larger bits of foam and then mask the areas you want to protect from the spray glue.

In the above image, I’m using 3-M Super 77 spray glue, the low mist variety. With my other hand I’m holding a cardboard mask. Apply generously and work in a well-ventilated area.

The above image shows what the wig looks like when it’s cut into short lengths.

As shown above, roll manageable tufts of hair between your fingers so the strands line up, hold lightly and gently dab into the glue surface, leaving some of the strands behind as you lift up. Repeat, over and over and… Until....

Already not looking too bad. When the hair has been applied over the full area, use a vacuum cleaner hose to help stand the strands of “grass” up and remove any loose strands that didn’t stick. As shown above, the chestnut hair colour isn’t bad looking by itself if you’re going for a really late fall effect. The wig hair appears to have a lower sheen than the static grass products.

Above, the grass has been lightly oversprayed with the Liquidtex aerosol paints. The water-based paints do have a greater tendency to clog so it’s important to invert the can and clean the nozzle after each use.

You can really dress up the appearance of foam foliage clusters by hitting them with a light over spray of the chromium yellow. The above picture really doesn’t do justice to the treated piece on the left, but the spray highlights really help under typical layout lighting.

TaDa! Here’s the finished effect so far. I’ve added a fine landscaping sand into the fibres and around the edges of the treated area to blend the masked edges back into the layout. Other textures and colours of ground foam have been added. The larger bits kind of float on the grass and look really effective as small bushes. I then spray the area with a fine mist of soapy water and follow up with diluted white glue. Pushing the nozzle of the eye dropper or paint pipette into the base of the grass as you apply the glue really helps to anchor everything.
That’s it so far. I’ll hold off on larger bushes and trees until I see how it all looks against the backdrop. Cheers for now!
-Jim